

DIY Printmaking Holiday Prints
Making your own stamps for holiday (or "just because") cards!

It’s that time of the year when we start shopping around for some holiday cards to give to our loved ones, but why not make this year’s cards special with a personalized twist? For this week’s challenge, I will be guiding you on how to make some stamps from lino carving blocks to give your holiday (or “just because”) cards some personality!
What you will need:
Linoleum Carving Block (4” x 6” will work best for making cards)
Brayer
Block Printing Ink
Lino Cutter
Foil for rolling the ink
Graphite pencil
Printer (if applicable)
Fine line permanent marker (if applicable)

You may purchase a starter kit on Amazon linked above, or find the supplies at your local art store.
STEP ONE: Designing
There are many ways of going about designing your lino block. You can draw directly on it with a pencil (but note, the reverse of the image you’re making will be printed), or design separately then transfer the mirror image of the design to the lino block so that the exact version you draw will be the one printed. It depends on your preferences, but there is no wrong way to do it.
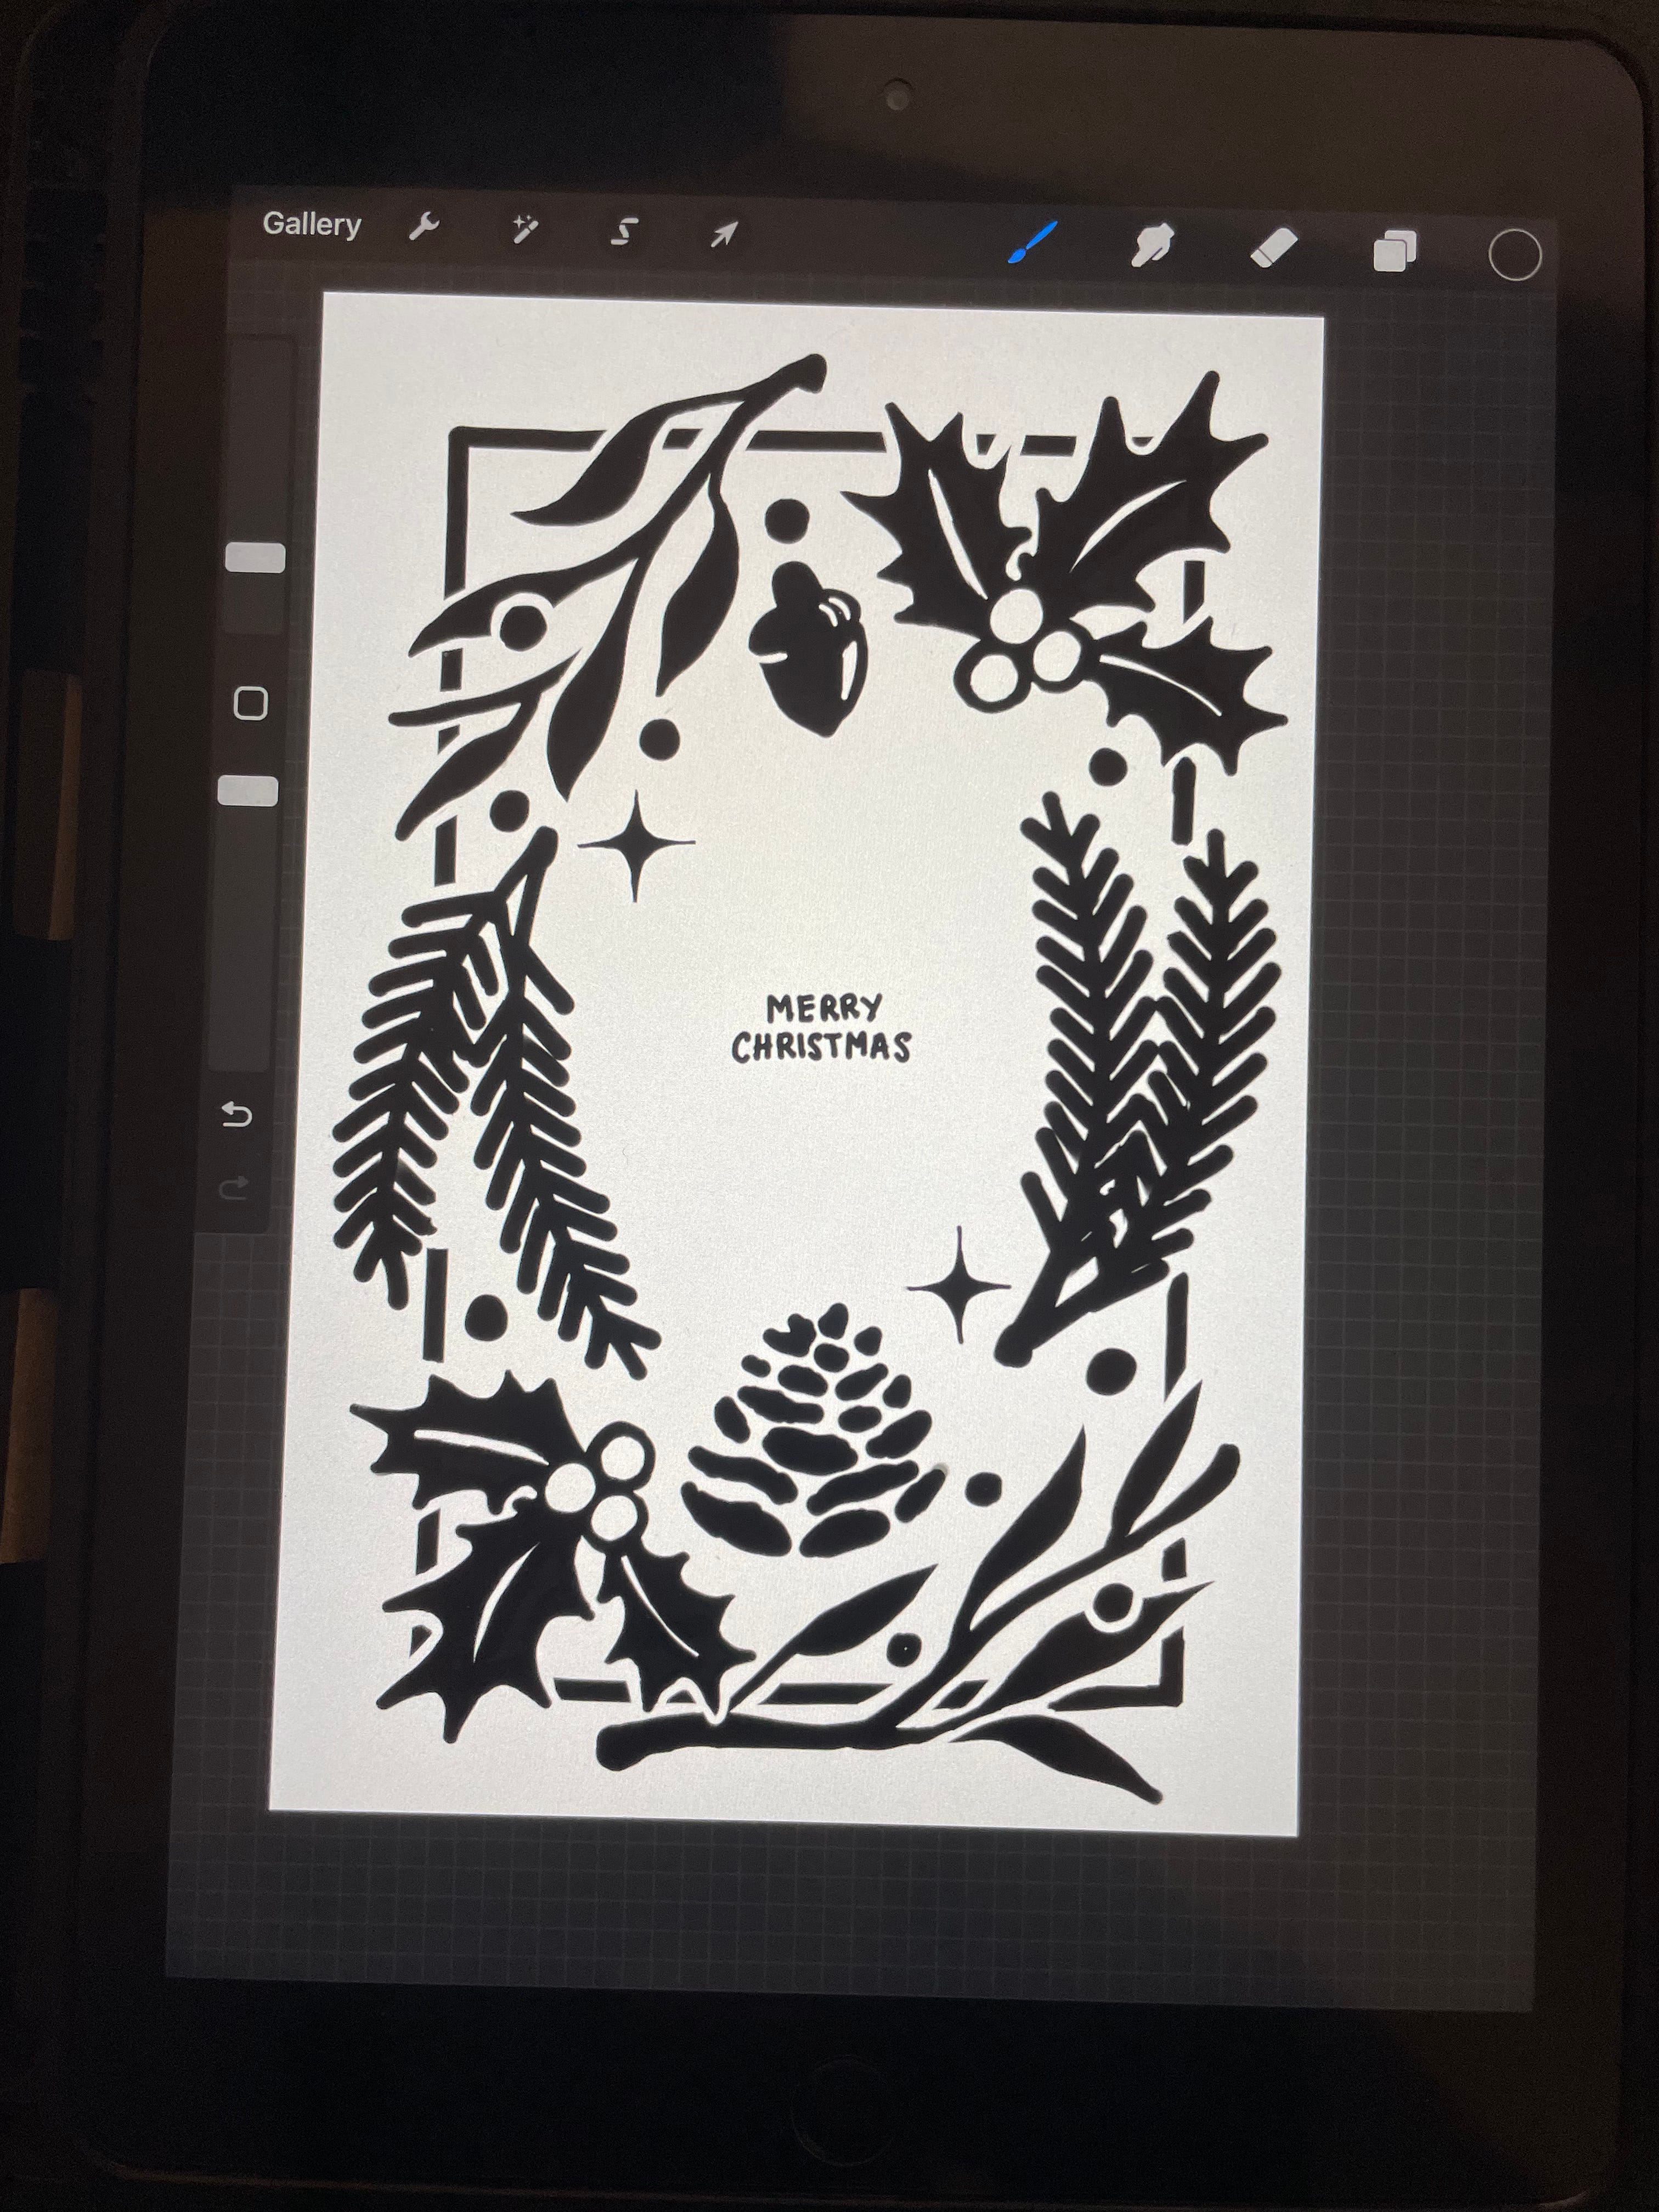
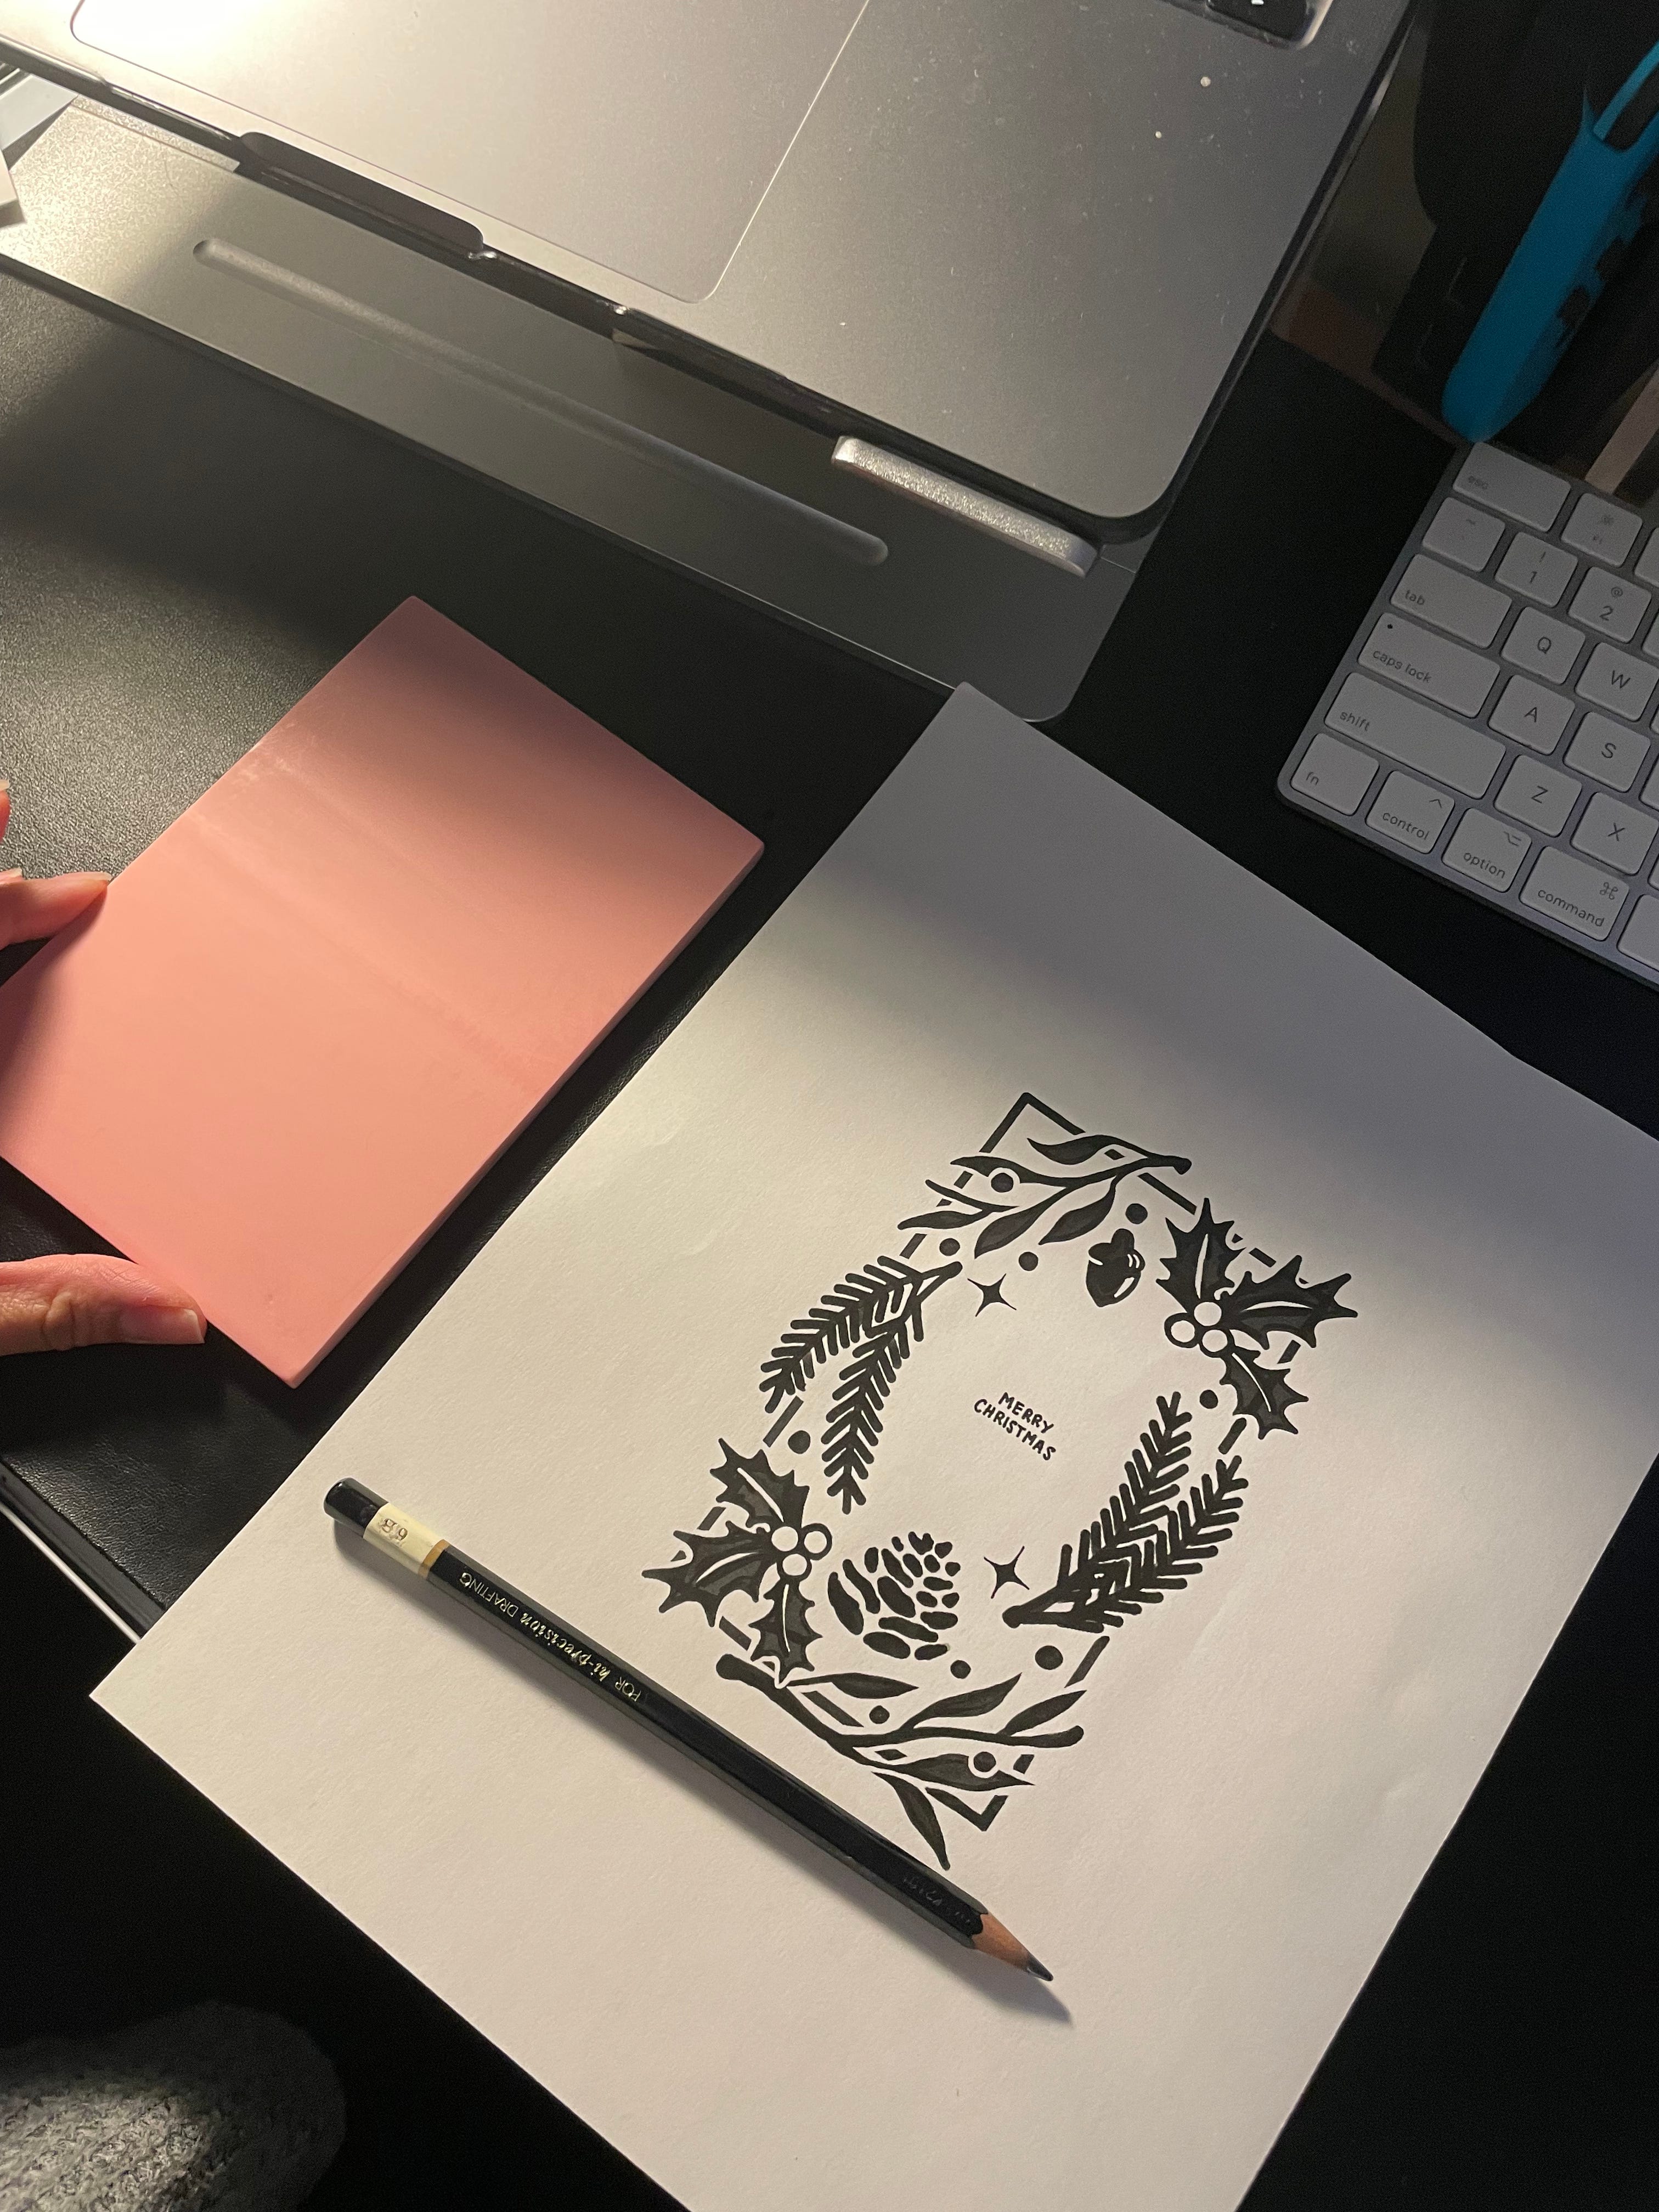
For this one, I chose to draw separately since I want the exact look of my design to be printed without worrying about the mirror image. I first sketched out my idea and then drew it digitally. (NOTE: You may also just sketch your design on a separate sheet of paper with a graphite pencil)
The sketch (top) and the digital (bottom). Note: On my digital artboard I made the size exactly 4” x 6” so I am aware of the exact proportions.
If you are designing on a separate sheet of paper with graphite, I recommend cutting your paper down to 4” x 6” so you are aware of the exact size of your background.
STEP TWO: Transferring Your Design
(Skip if you have drawn directly on the lino block)
There are two ways to transfer your images onto your lino block.
If you drew on a separate sheet of paper with graphite, then you may align your drawing to the 4” x 6” pad and press down on the paper to transfer the graphite design onto your lino pad.
If you designed it digitally, you may print your design and cut it to size. Then with a graphite pencil, trace over your design. You then will register your paper to the carving block by pressing down and transferring like the step above.
There are other ways to transfer your design, but this is the method that worked best for me with the supplies I had on hand.
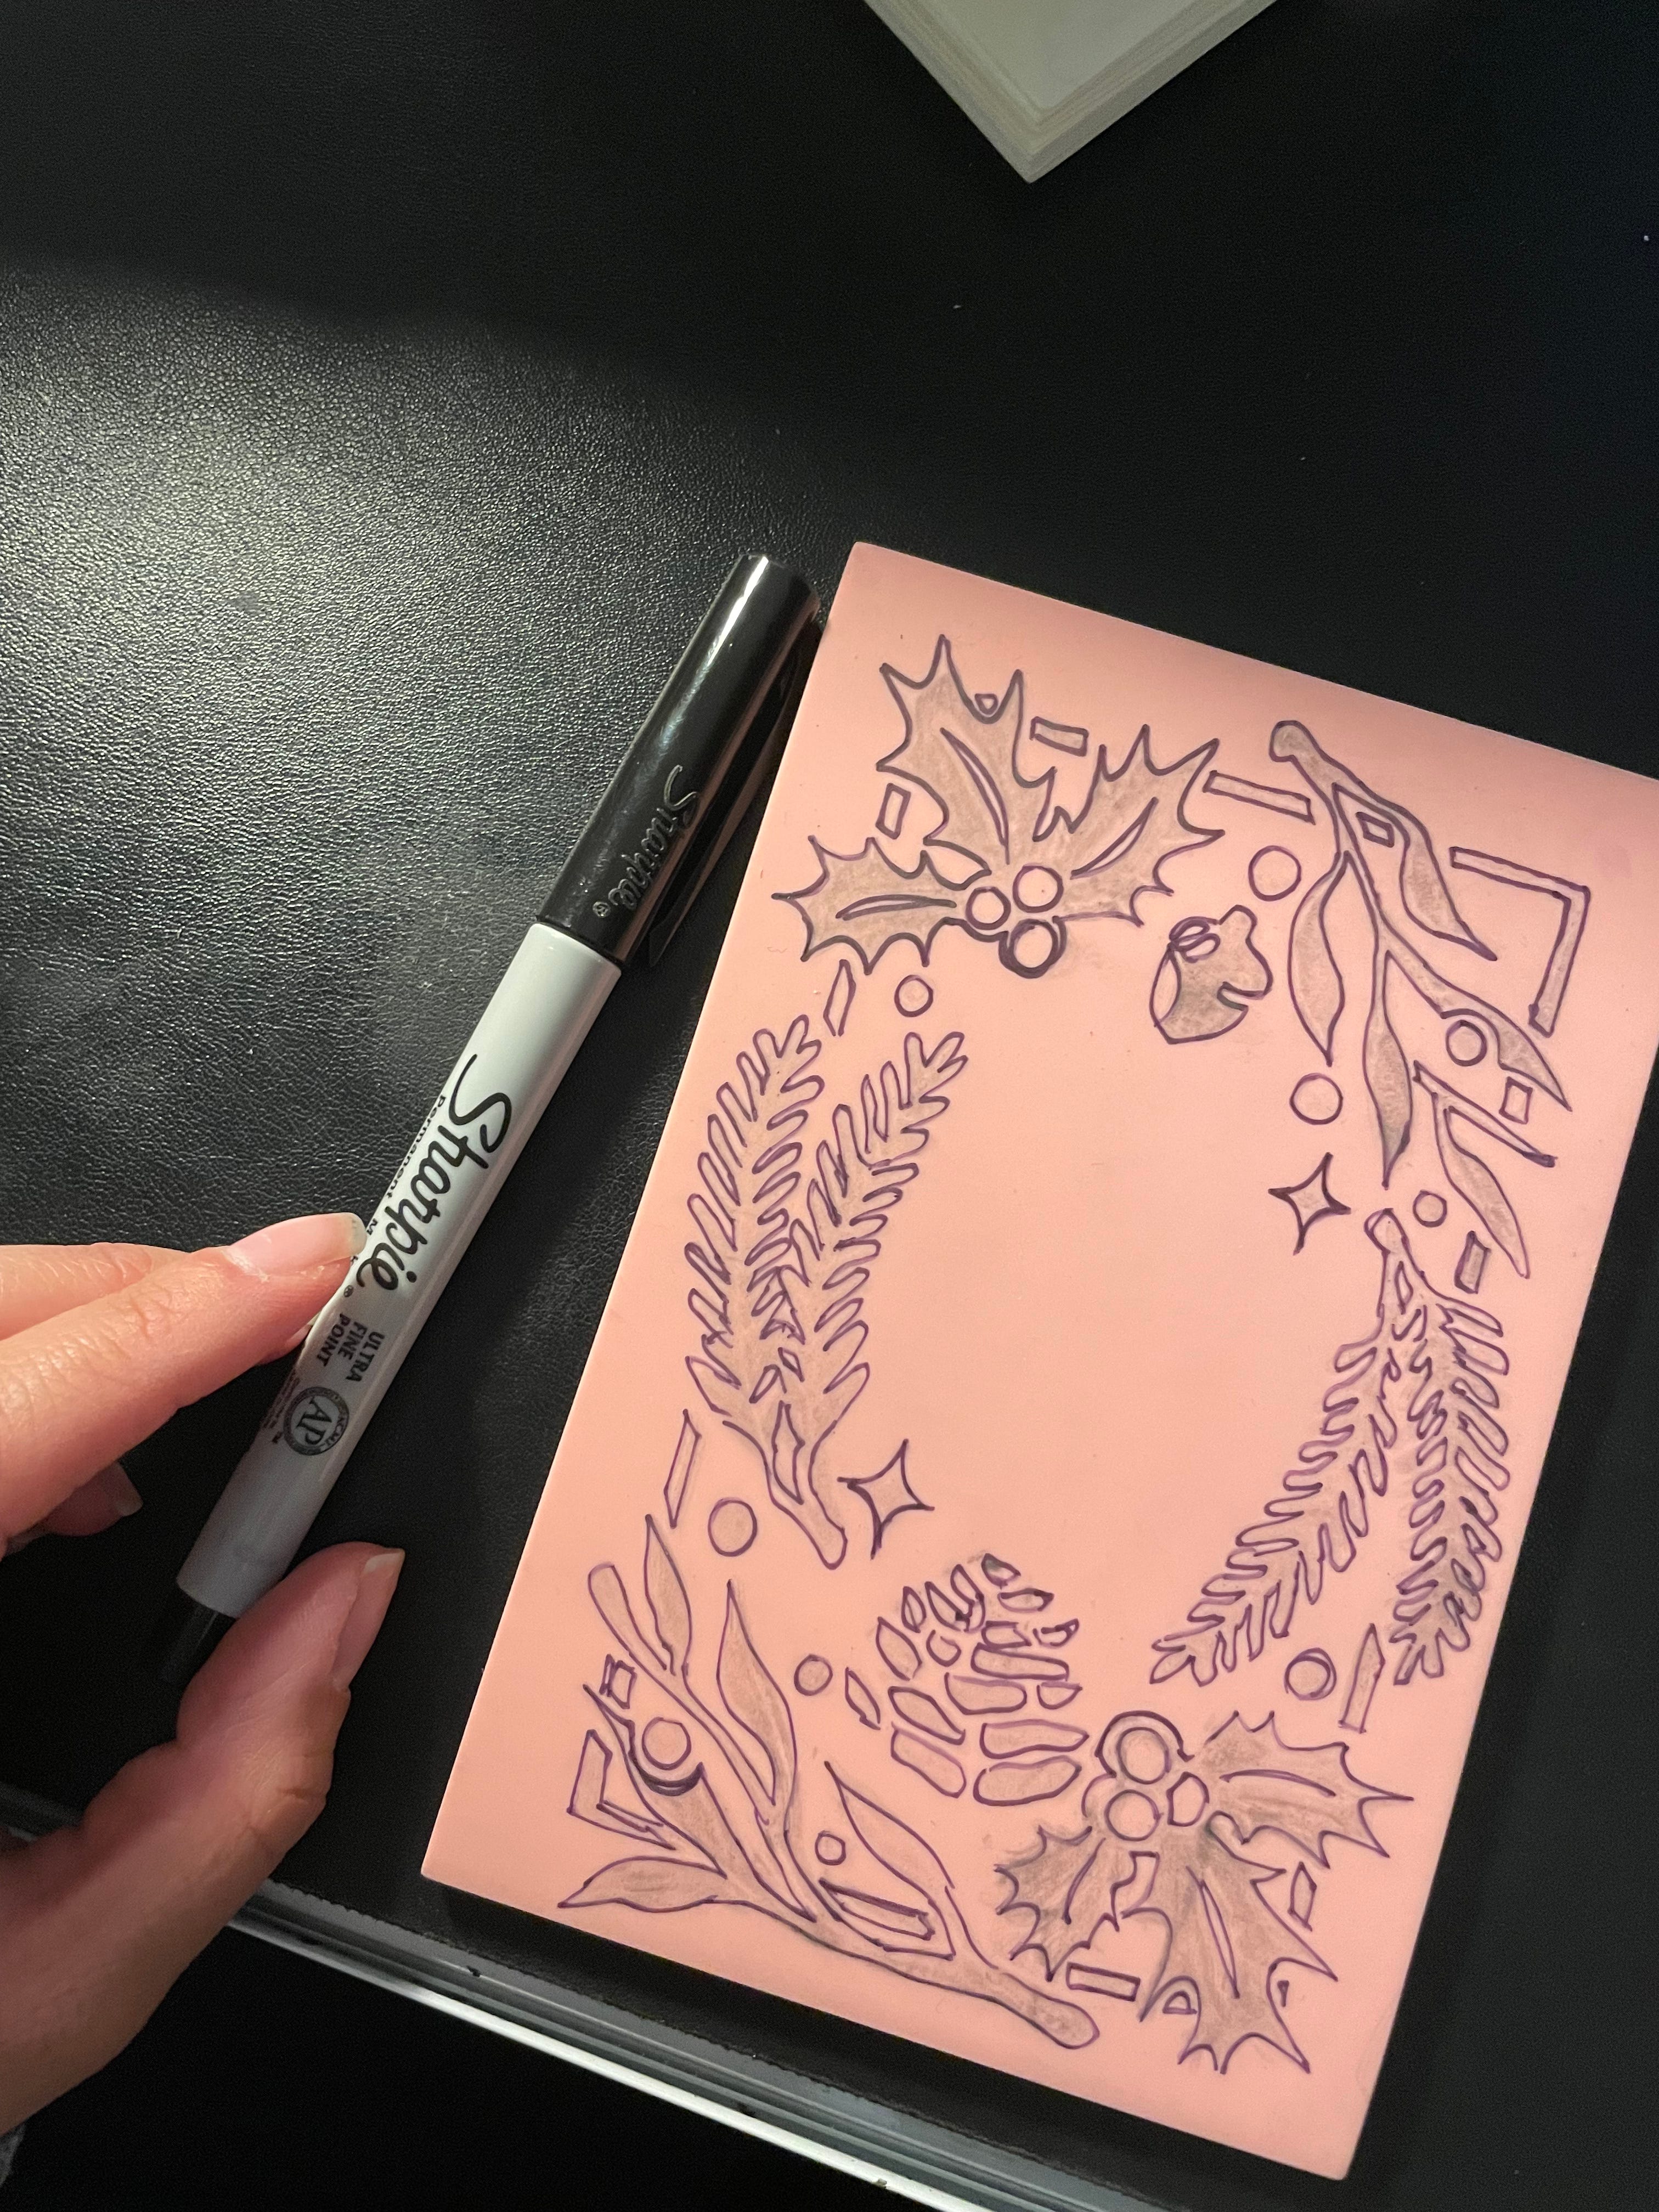
Usually, the transferred graphite mirror image can be very faint, so I recommend going over the edges of your design with a permanent marker.

Here is the block after I had gone over the edges with a fine-line Sharpie:
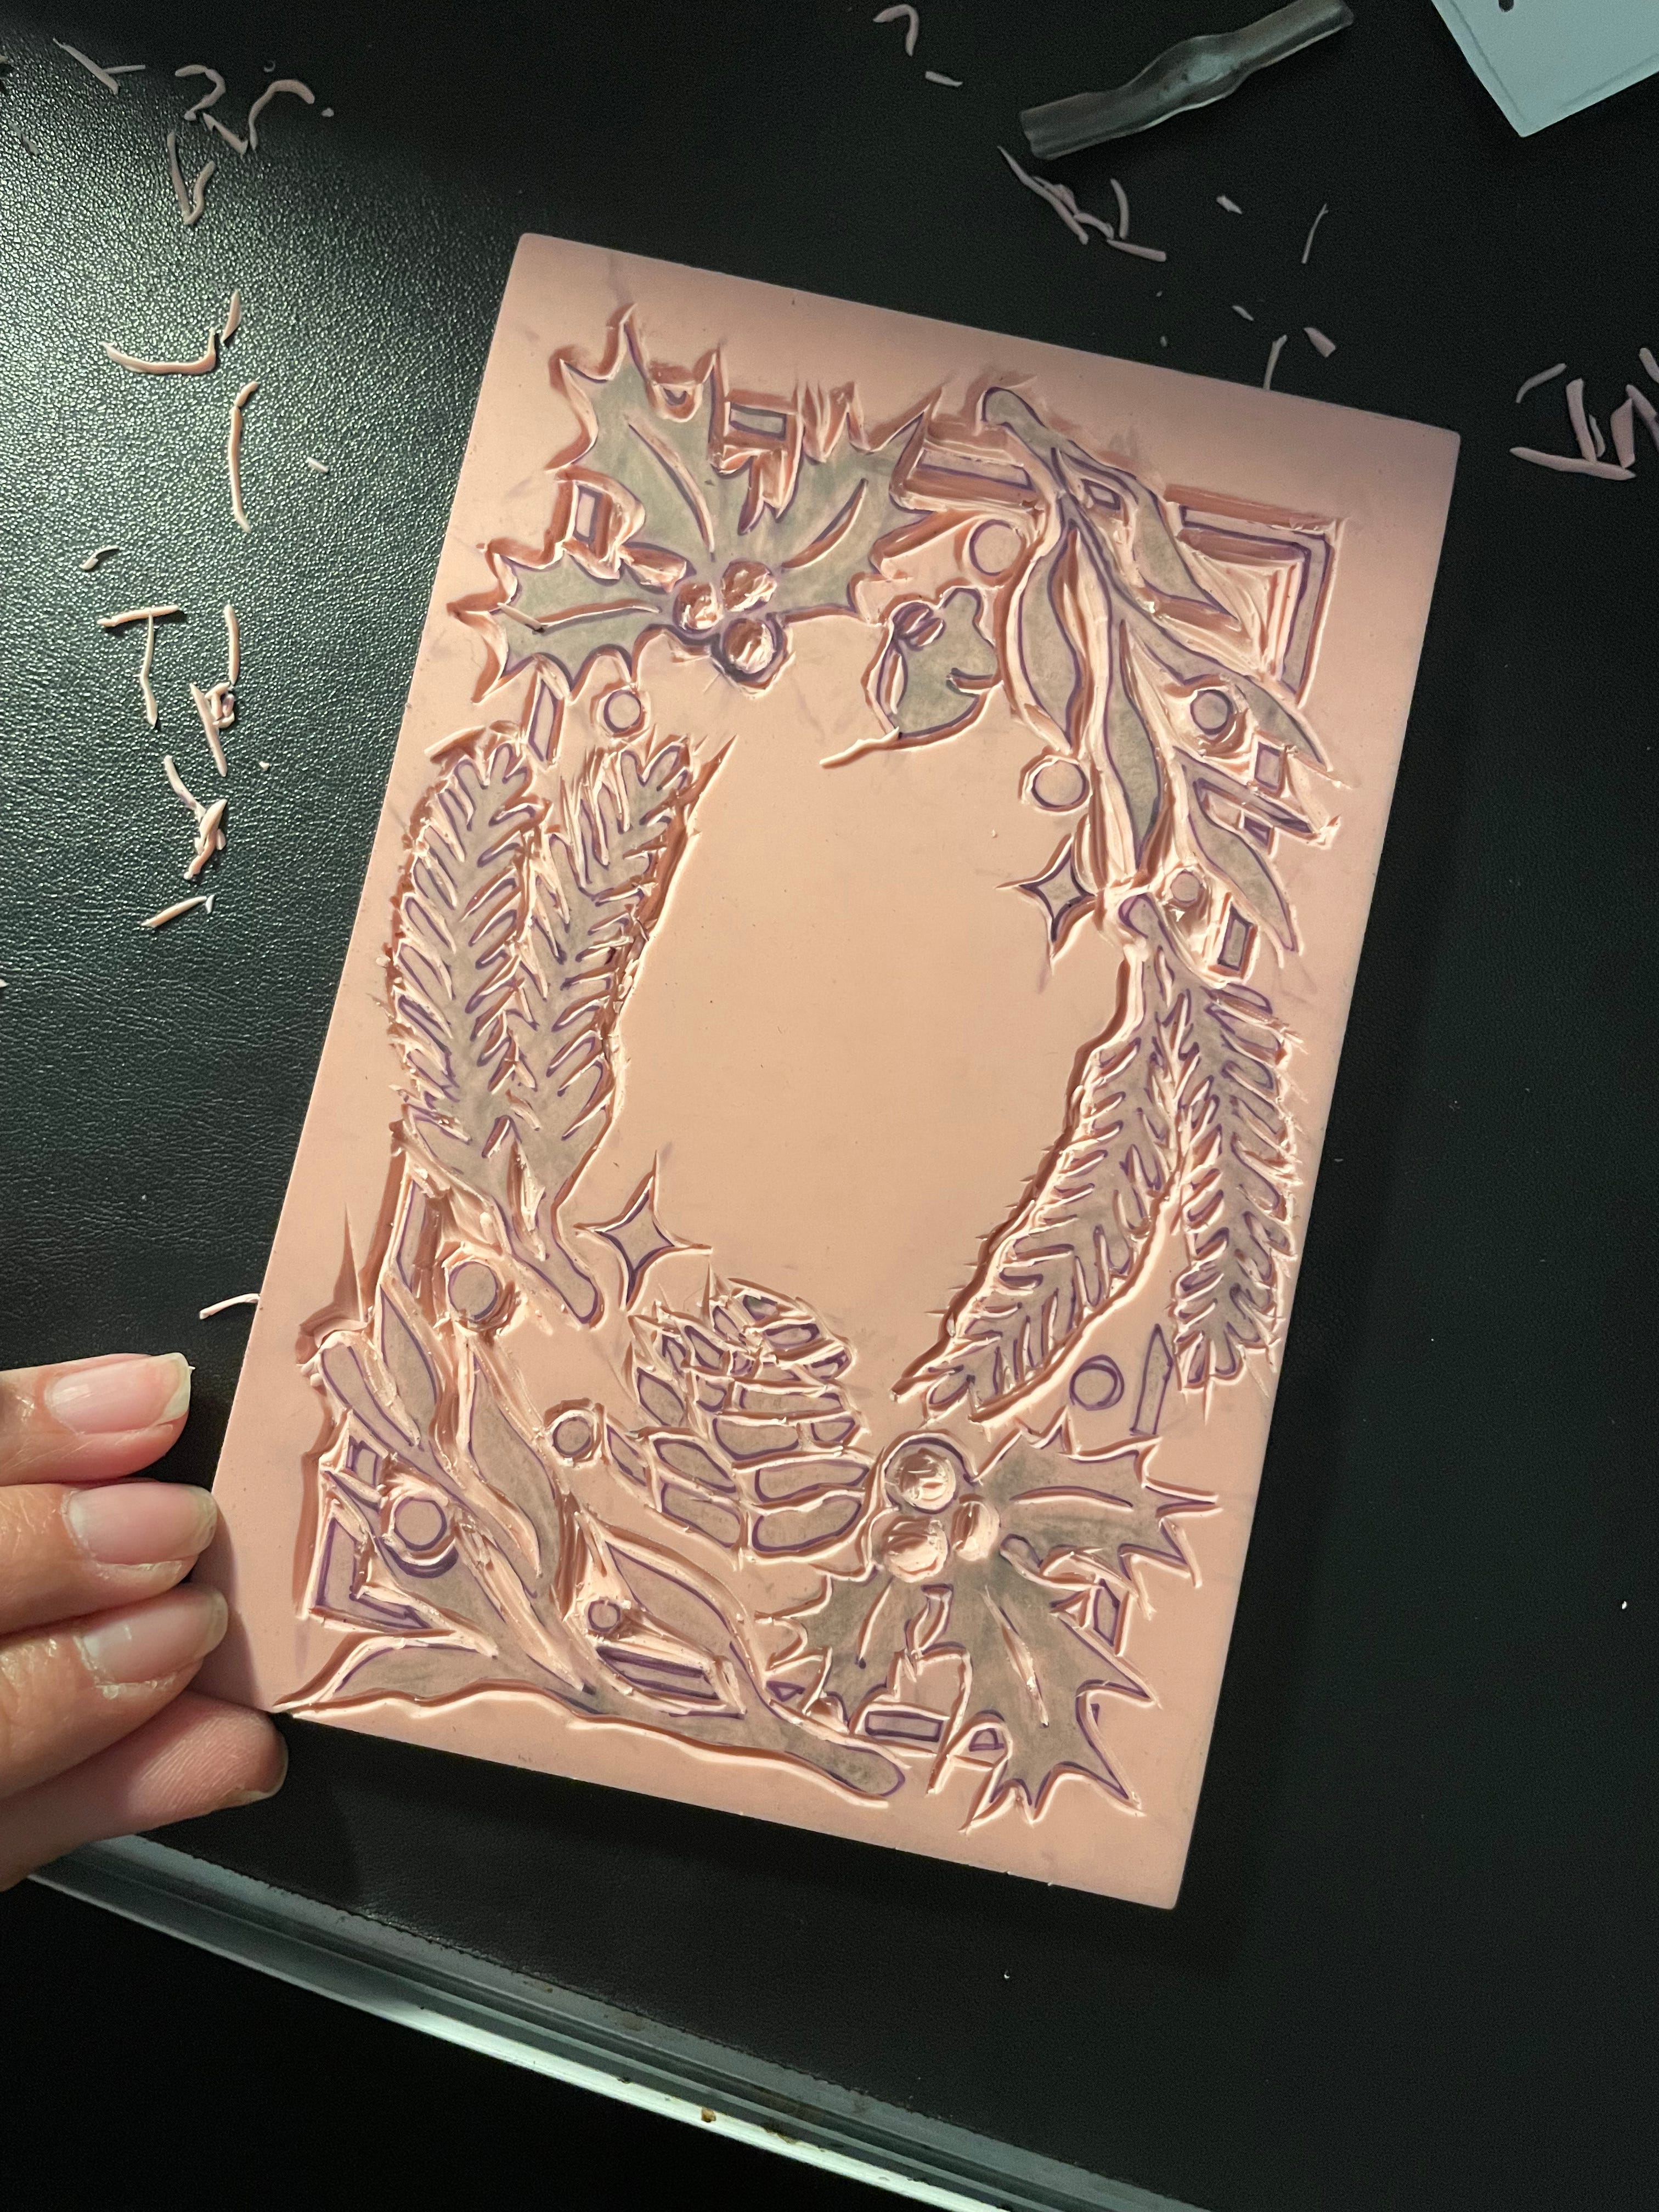
STEP THREE: Carving your lino block
This step requires a lot of patience, but I promise you, the results are worth it! With your carving tool, I recommend going over the very tight areas and the finer details with the smallest carving knife setting that comes with your kit first, then tackling the much larger areas with the bigger knife attachments.
This part is more intuitive and hands-on, but a tip I have is not to focus on making deep cuts but on making accurate cuts, you can always go back to make a second pass but cannot go back to put back a rubber piece. Once the lino is cut, it is cut.
Also remember that what you will be carving out is going to be white space, and what is not will be what is making the impression!
Here is my block after I had cut most of the tinier details out, and then I went back in to make those larger cuts.
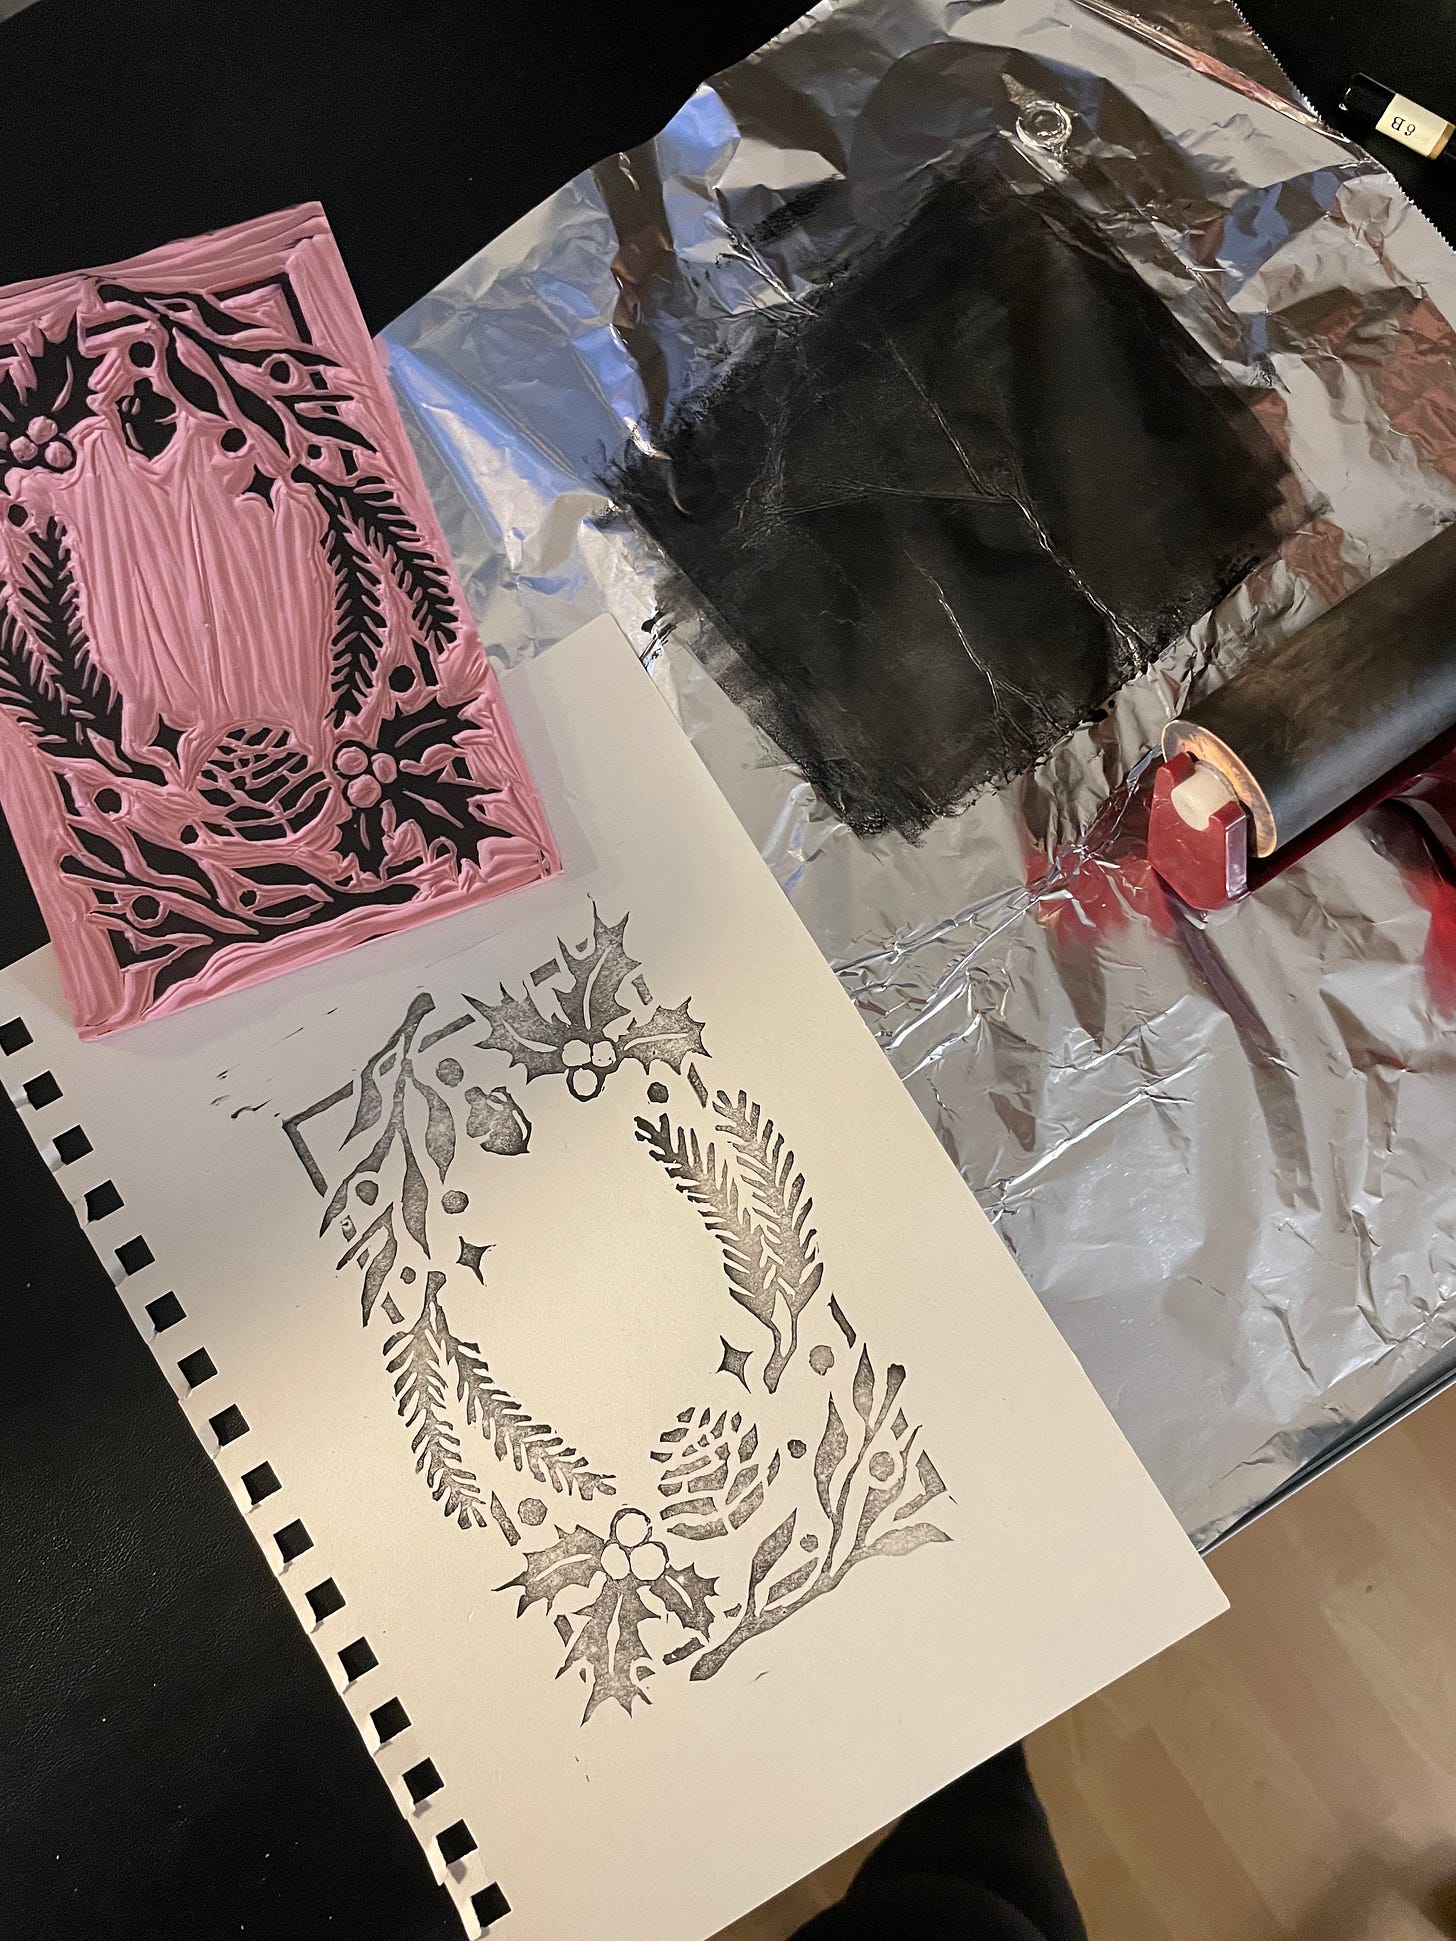
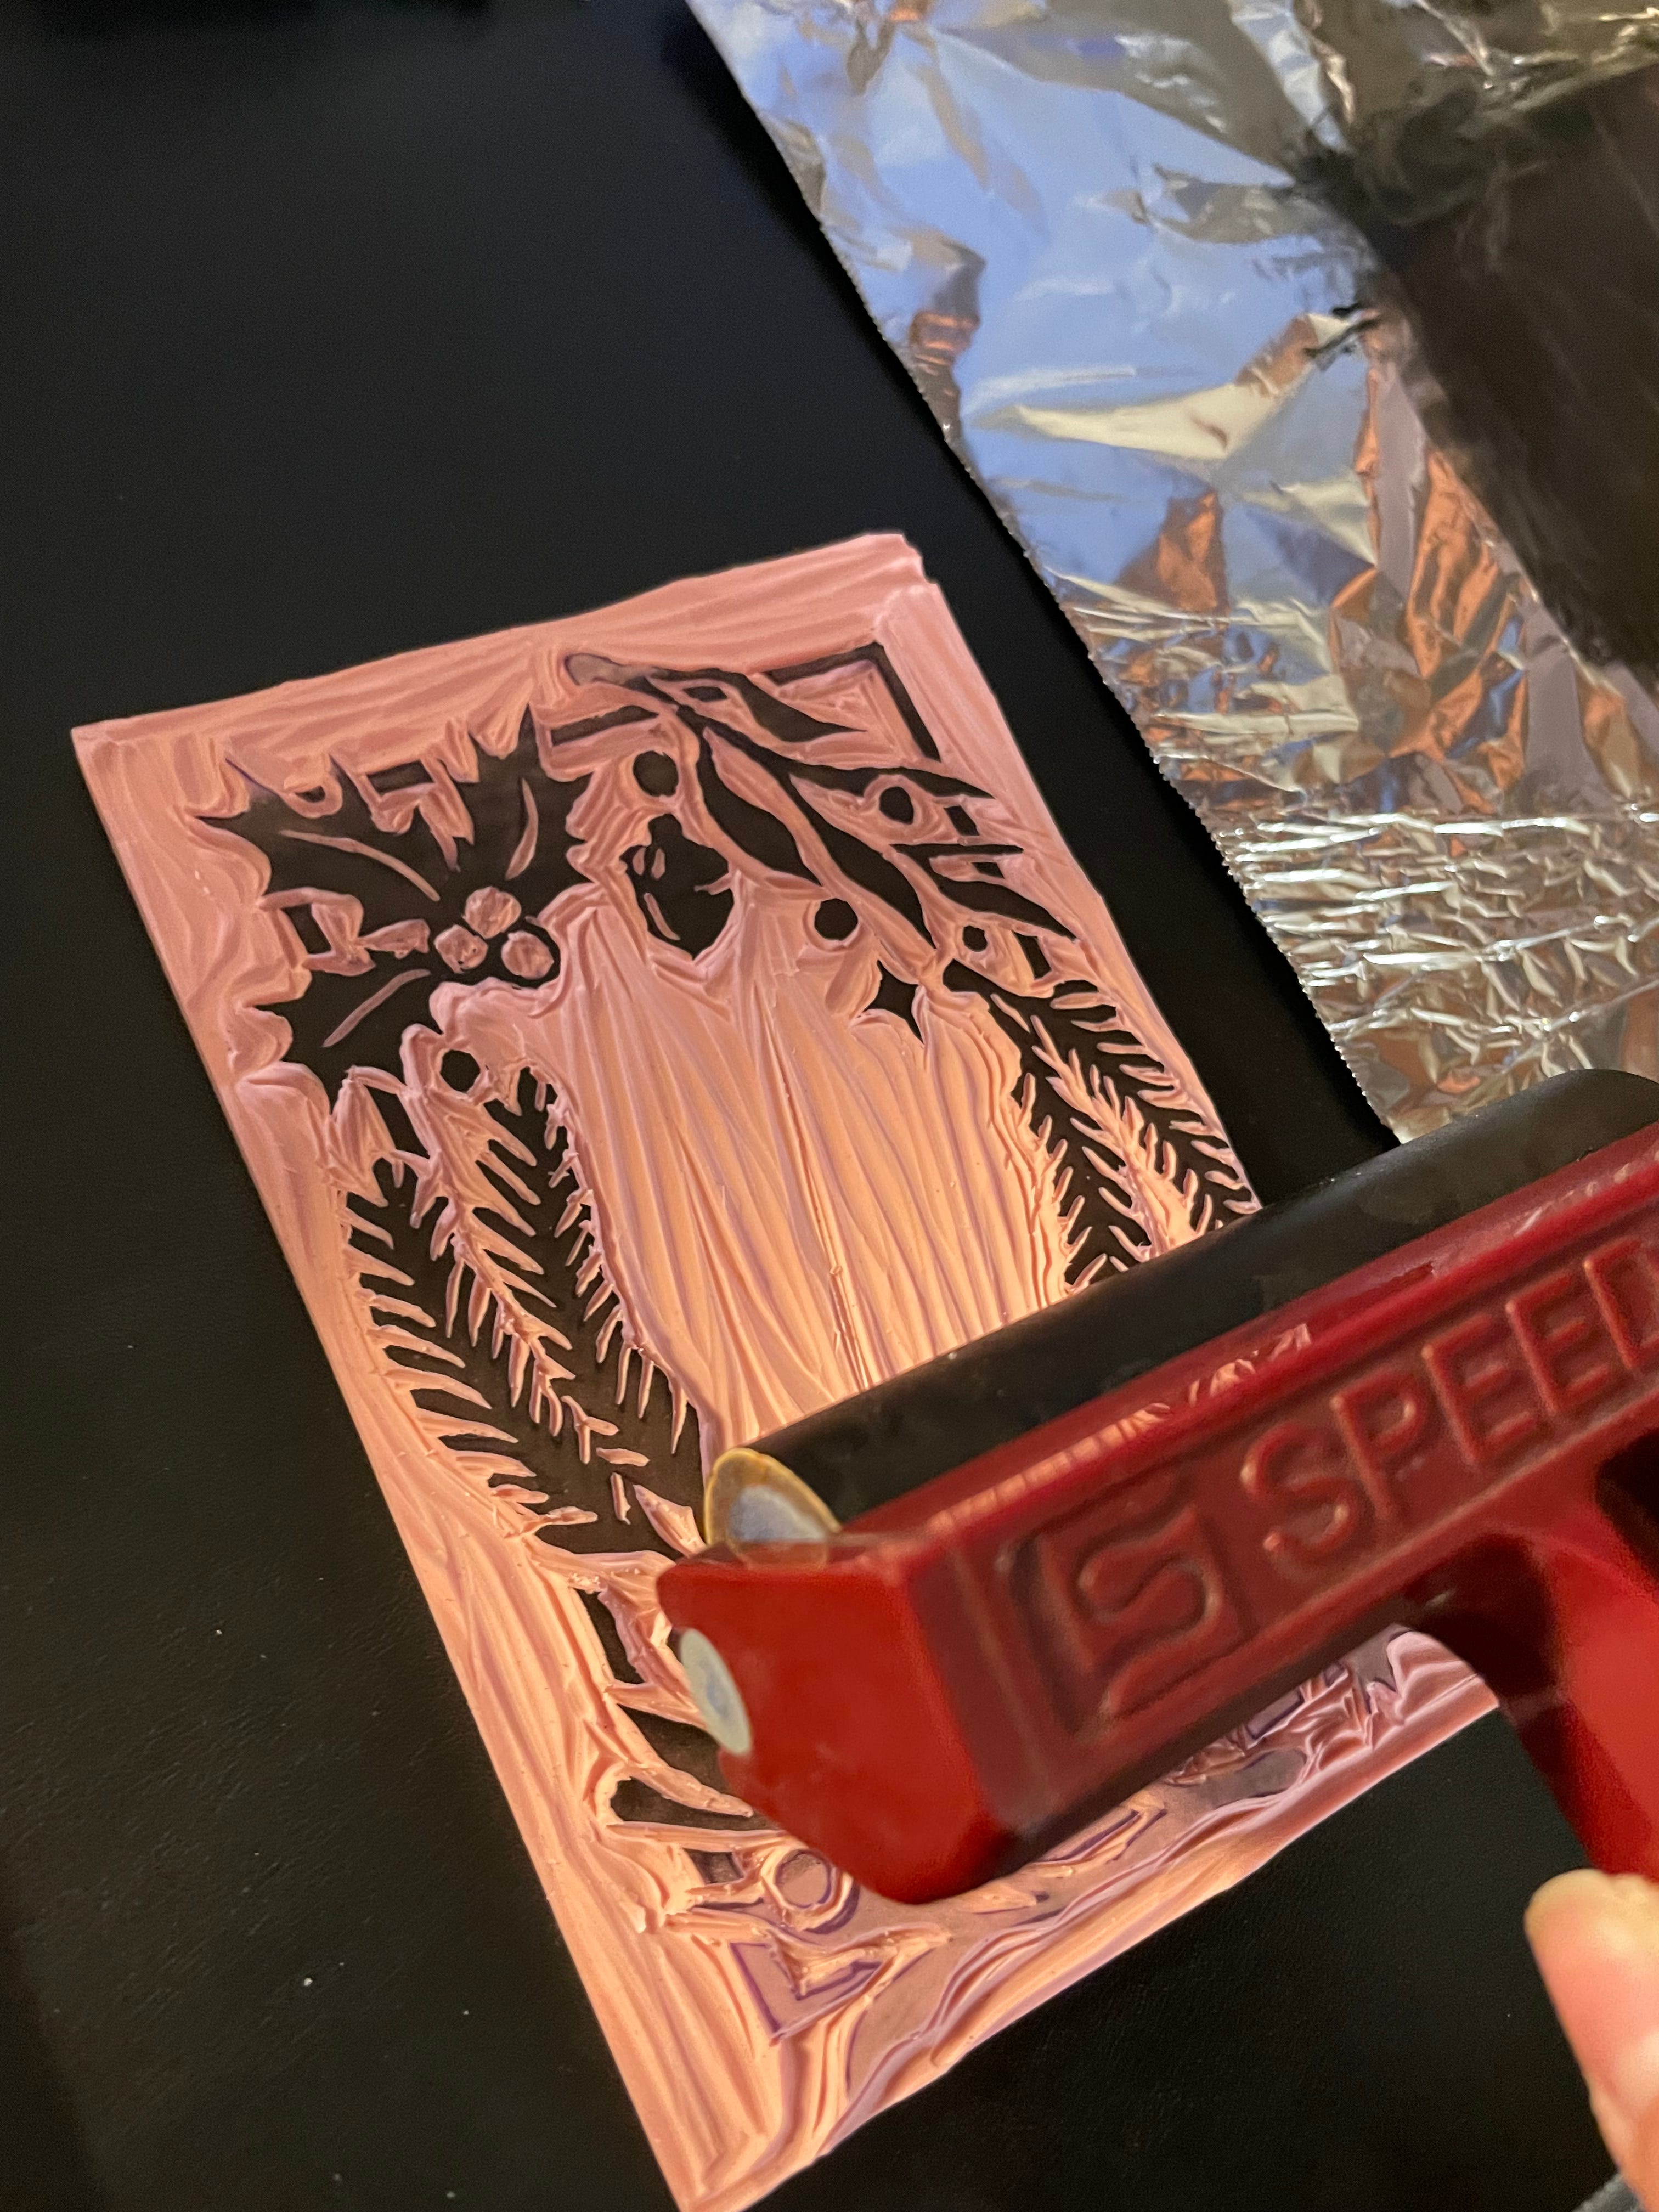
STEP FOUR: Inking and Printing
After all your hard work carving is finally done, it is time to get the ink going! For this I used a foil sheet as the “matrix” (printmaking term for the physical surface you manipulate the ink with a brayer before putting on your block). Plexiglass is traditionally used as the matrix, but I used foil since it is easy to dispose of (don’t burn me at the stake!)
Put a small amount of ink on your matrix.
With your brayer roll the ink up and down, left and right until the ink is evenly distributed.
Check if the ink on your brayer is also evenly distributed (very important!)
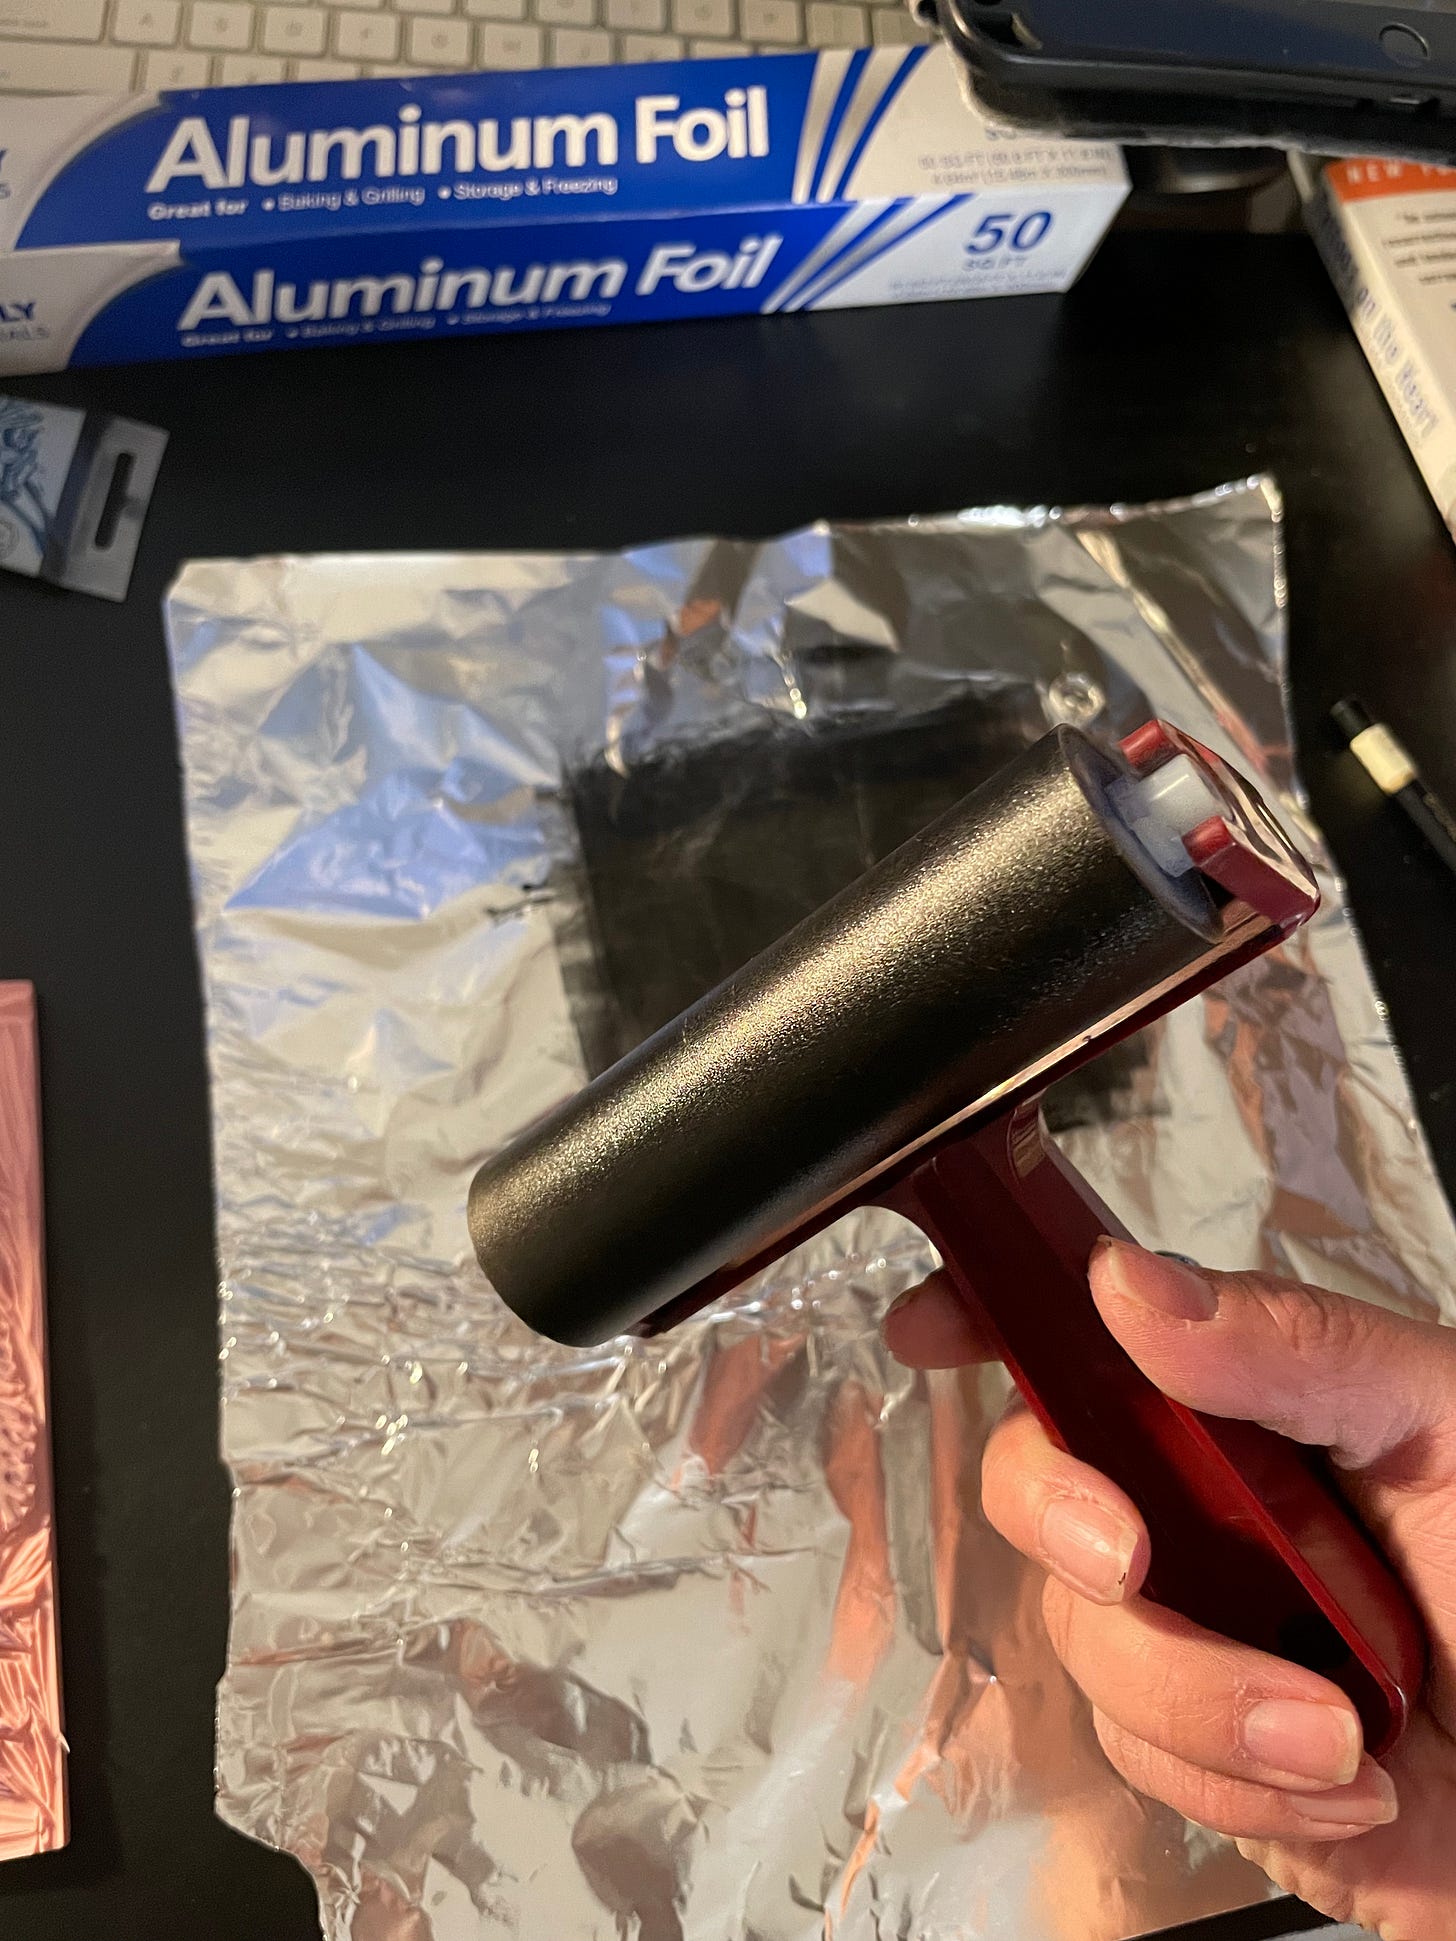
Start inking our linoleum block, and make sure all the ink is distributed here too.

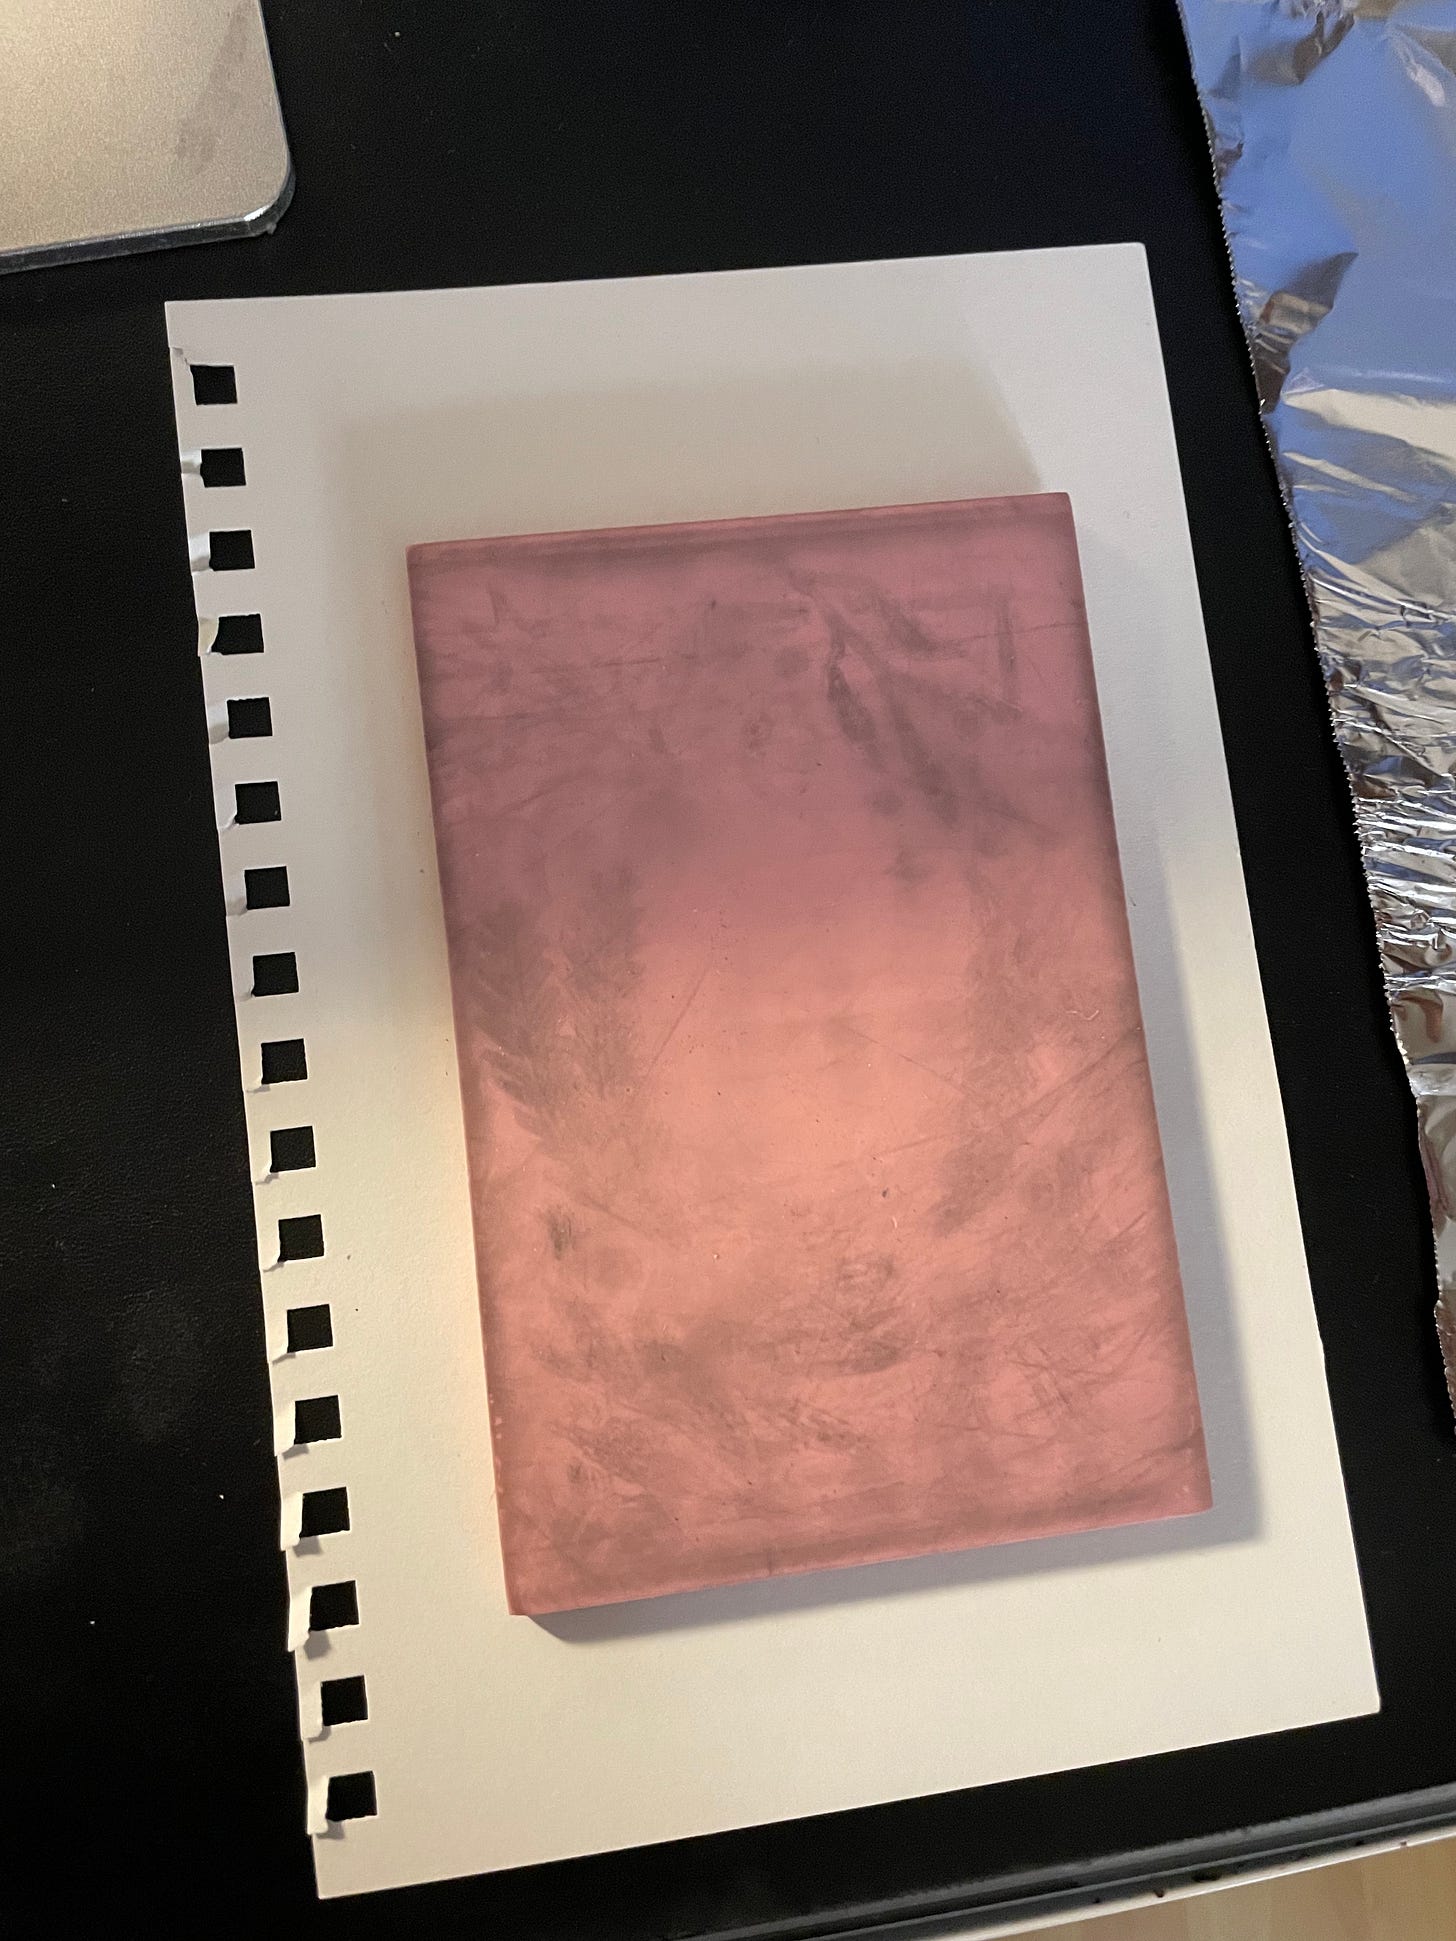
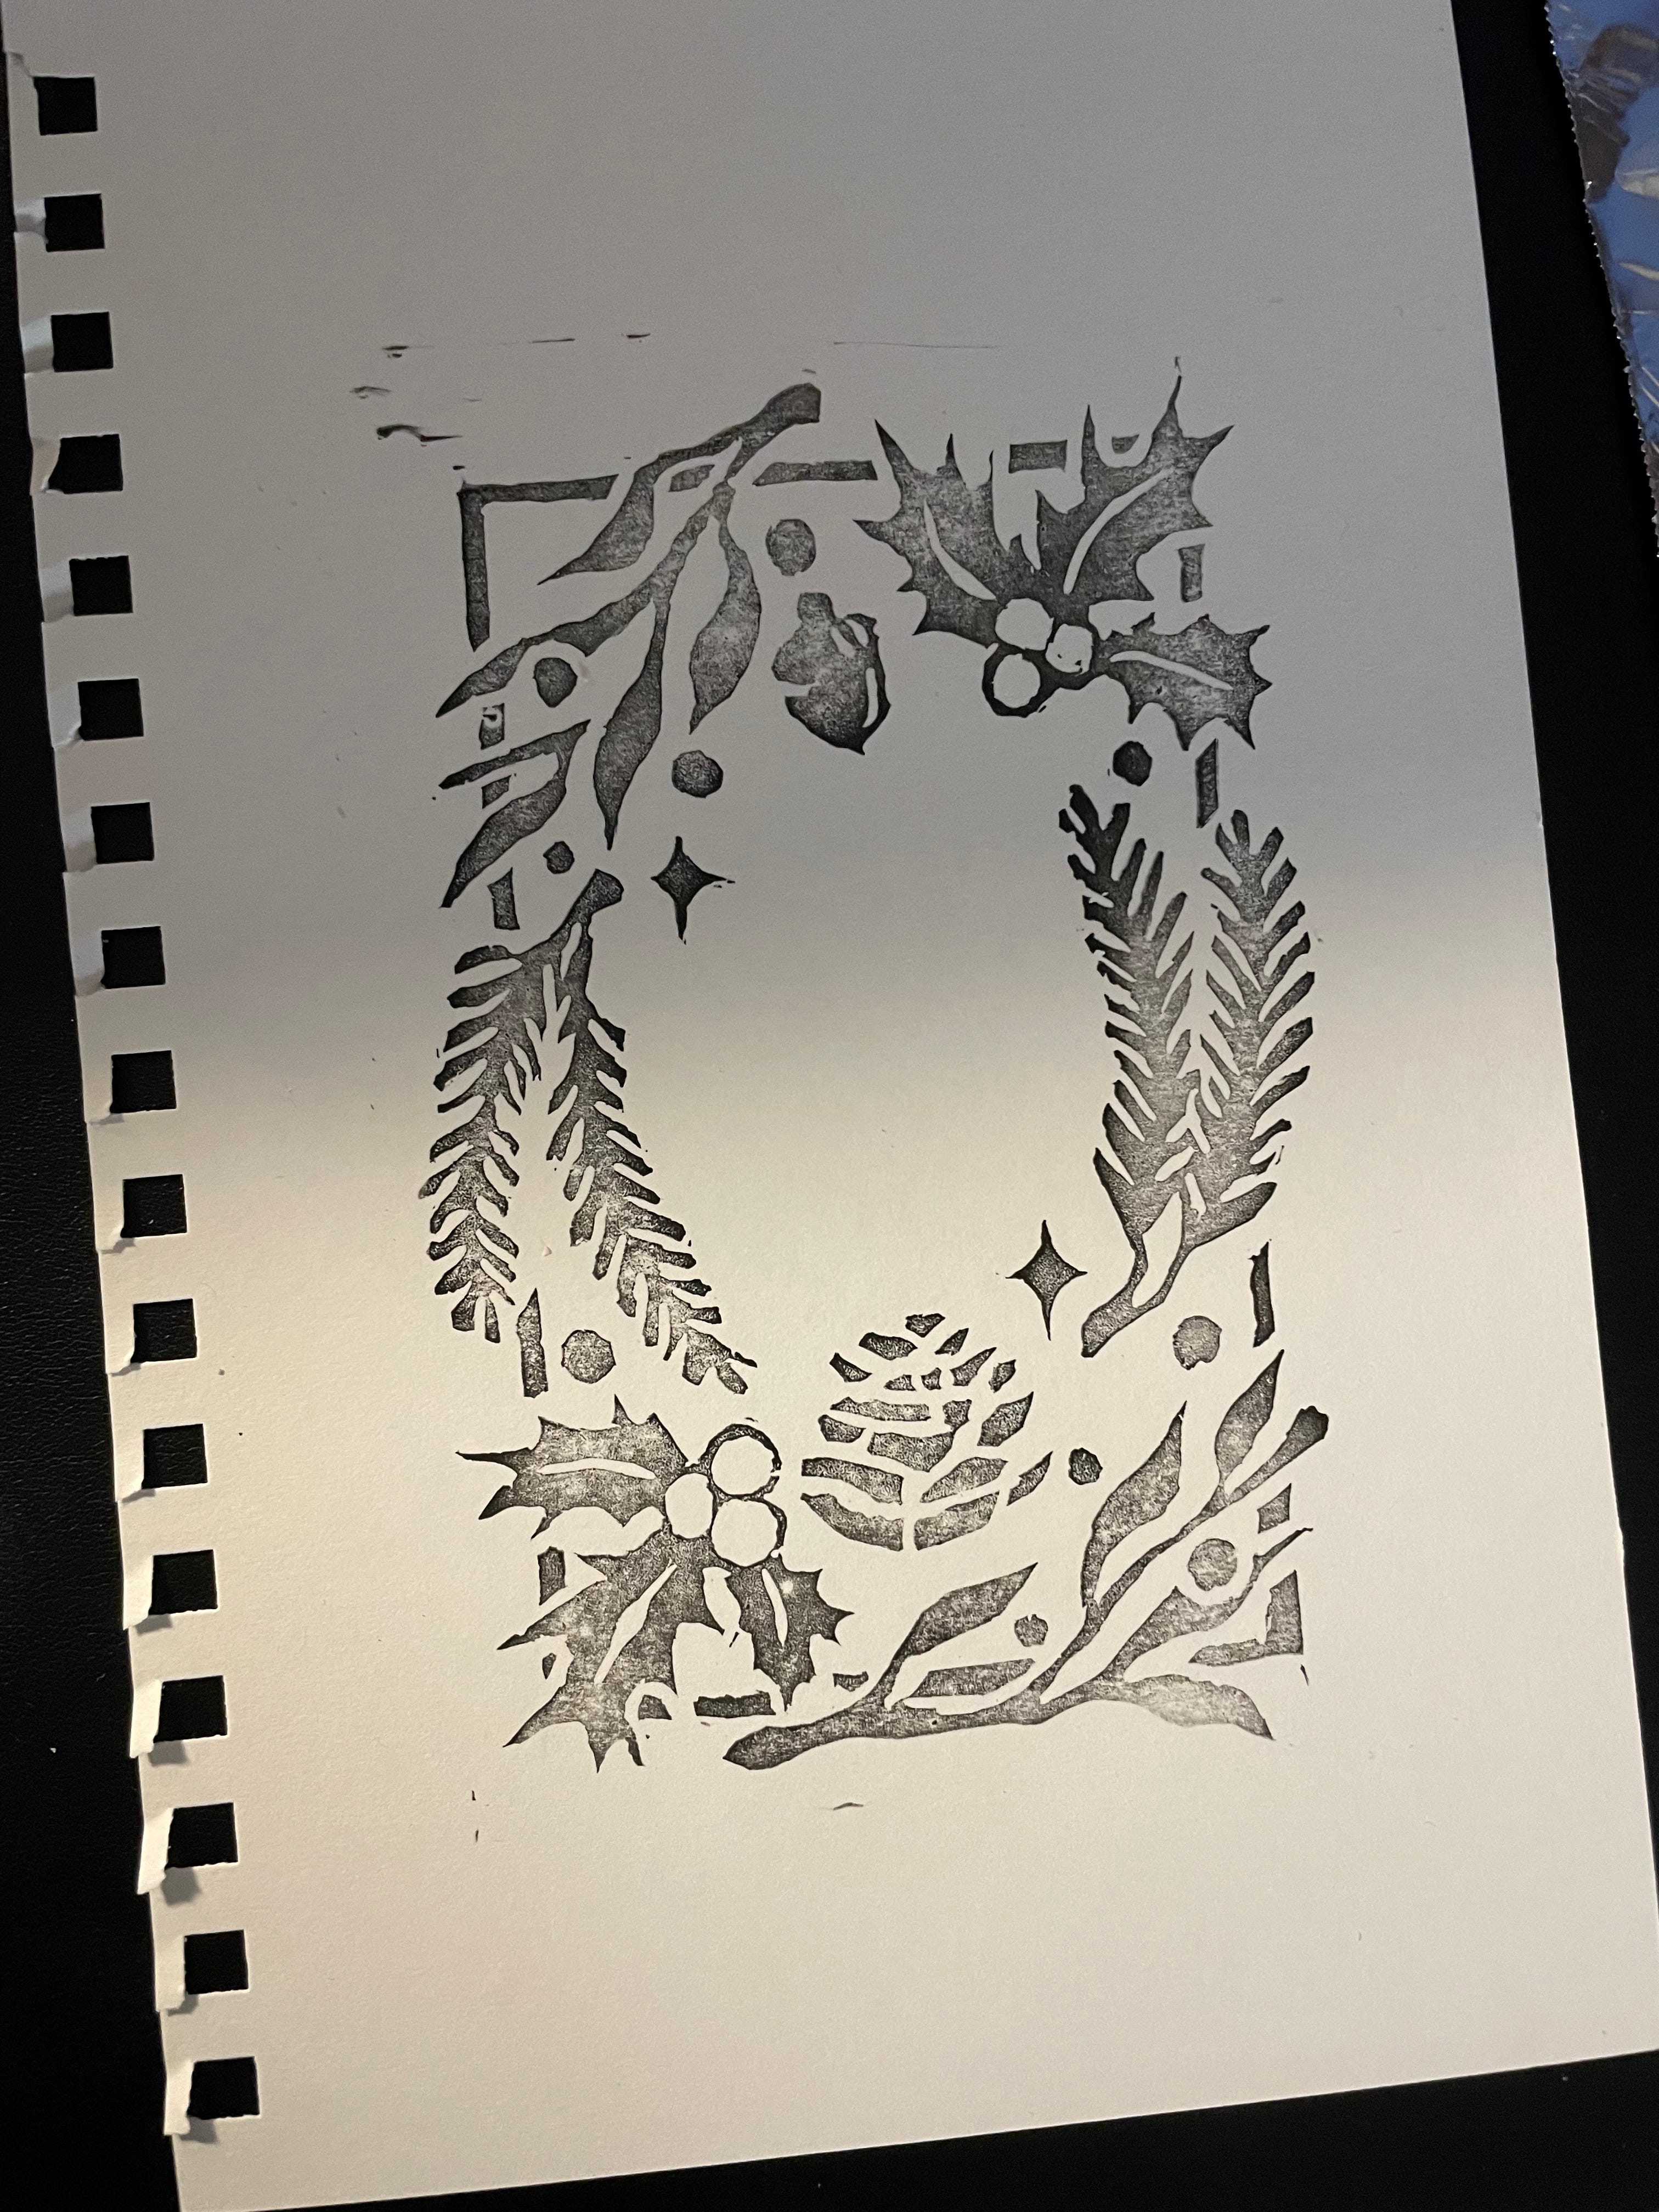
Register the block, then with a heavy surface, apply weight evenly to your paper. You may use a baren to help, but I did not have one. When using a baren, you register your paper on top of your block instead of registering your block on top of your paper. Ideally, I should have done the latter in the first place, but the result was still satisfactory.
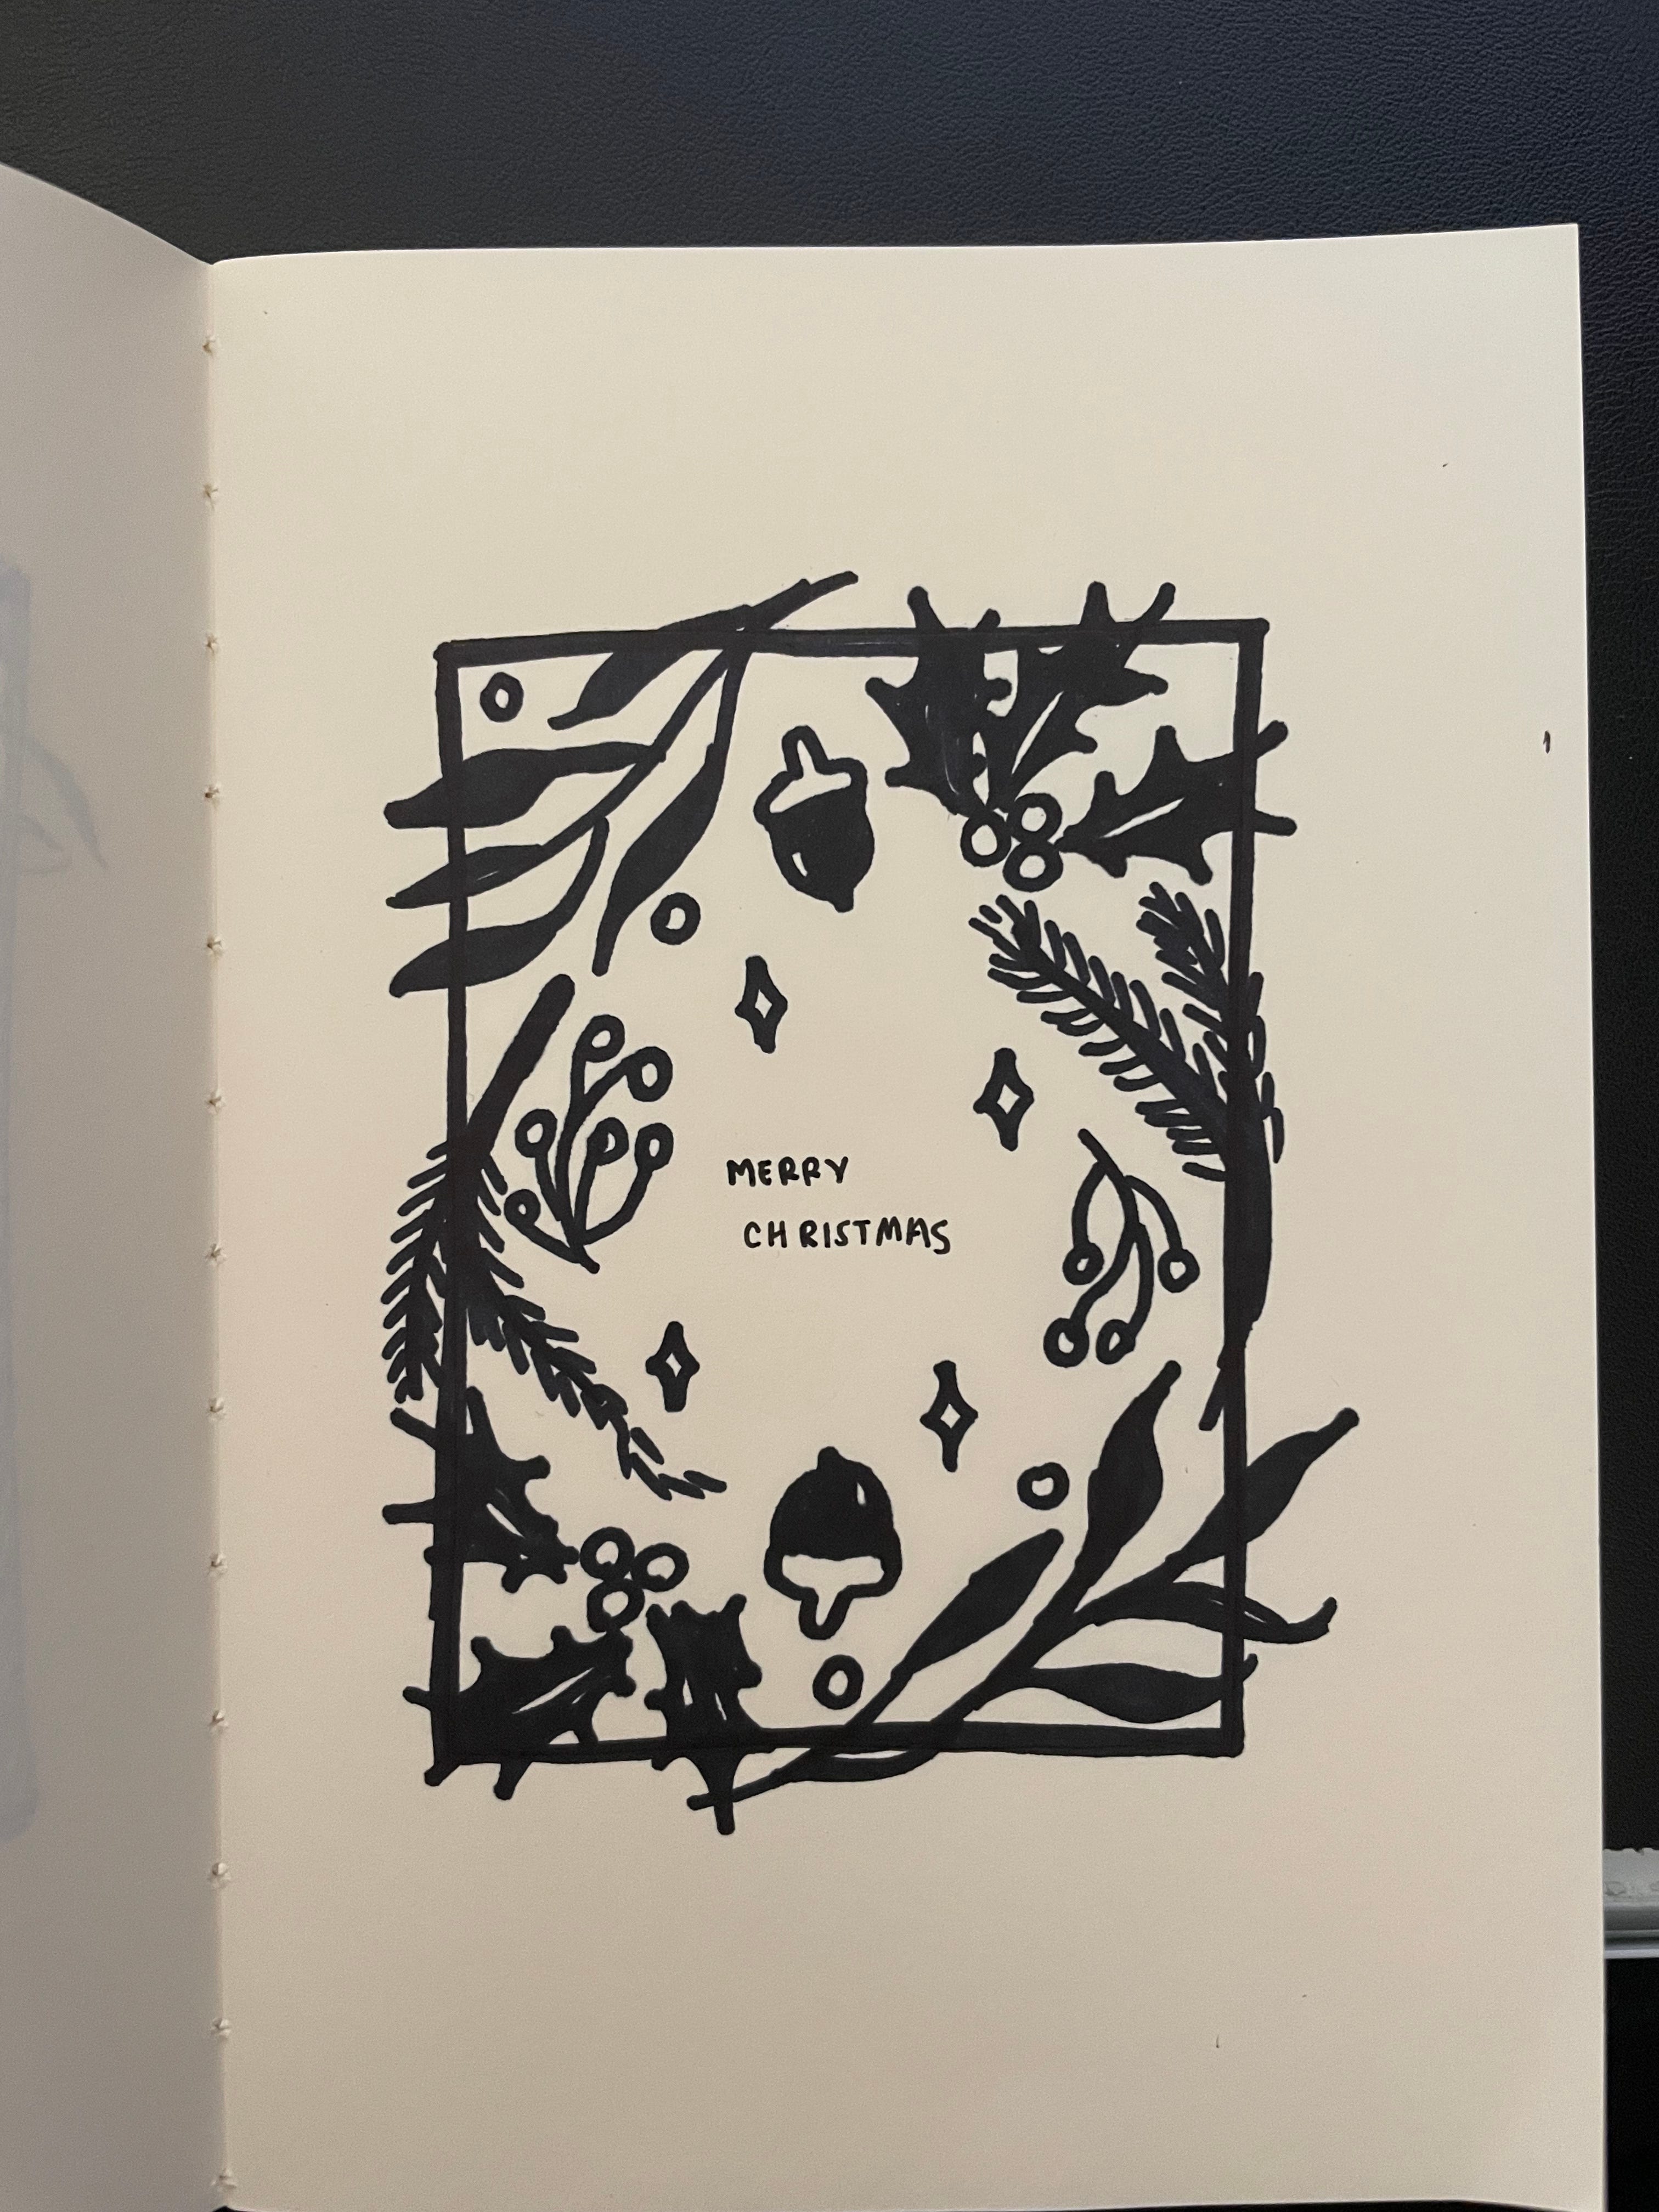
Make as many prints as you like. For this one, I had done it on sketchbook paper to check the print. Although not shown in this post, I will be making this on handmade paper for Christmas prints that will also be my Christmas cards


Closing Thoughts:
Printmaking is such a gift to participate in. It’s time-consuming, but the results always bring joy to the artist in me. There’s something so special about the imperfect edges of the design and all the effort it takes to make something like this; it feels like gifting a piece of yourself to someone.
Hope you enjoyed this post, and hopefully it made you curious to try printmaking if you haven’t already. Happy Holidays and see you next time!
-Carissa
Love this! :)